|
"Upgrade to Windows Vista - Licensing, Compatibility Issue and Installation Steps"
|
||||||||||||||||||||||||||||||||||
| Windows Version | Vista Home Basic | Vista Home Premium | Vista Business | Vista Ultimate |
|---|---|---|---|---|
| Windows 2000 Professional | No | No | No | No |
| Windows XP Home Edition | Yes | Yes | Yes | Yes |
| Windows XP Professional Edition | No | Yes | No | Yes |
| Windows XP Tablet PC Edition | No | No | Yes | Yes |
| Windows XP Professional x64 Edition | No | No | No | No |
Note: You cannot upgrade your old versions of Windows to Windows Vista Starter and Enterprise edition.
Upgrade to Windows Vista - Installation Steps
This section will show you step-by-step how to upgrade to Windows Vista from your existing Windows. Well, the installation process is almost same as clean installing Vista. So, here we will shows you the steps that are different.
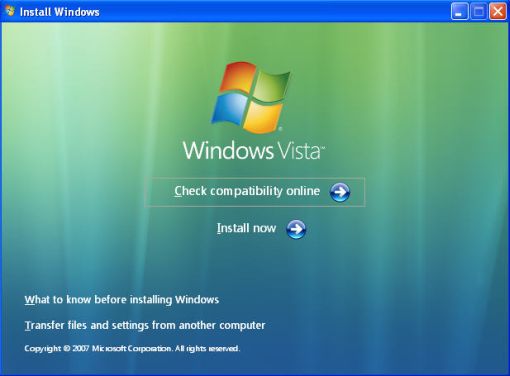
1. The first difference is that you will launch Windows Vista Setup from within Windows XP desktop environment. So, just insert the Windows Vista Setup DVD into the PC/laptop DVD drive. The setup process will auto-run, and you will see the following screen.

2. Click Install Now to continue. In the next step, you'll be asked if you want to go online to get the latest updates for installation. Make sure you are connected to the Internet and setup will search for and download any updates. Select the 'Go online and get the latest updates for installation (recommended)' option.
3. Setup will proceed as it does during a clean install, and you'll enter the product key, and accept the license terms.
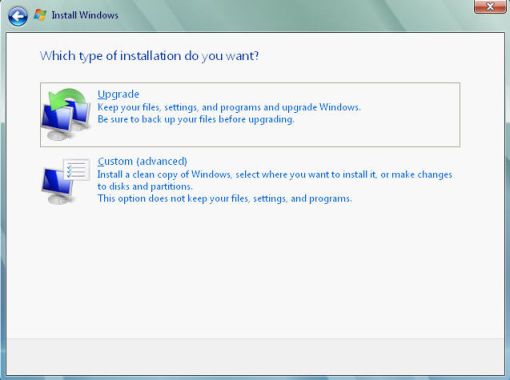
4. The next screen will ask the type of installation you want. Select the Upgrade option. Setup runs a compatibility check to determine whether any of your hardware or software will need to be reinstalled-or will work at all-after the upgrade is completed.

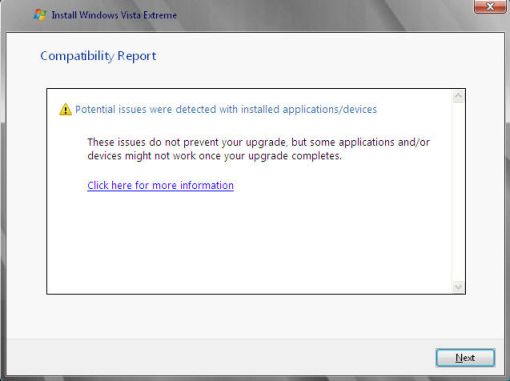
5. After scanning your system, Setup will show you with a Compatibility Report, as shown below. This screen shown that your computer doesn't have software that prevents you from upgrading the operating system. Click Next button to continue to step 7.

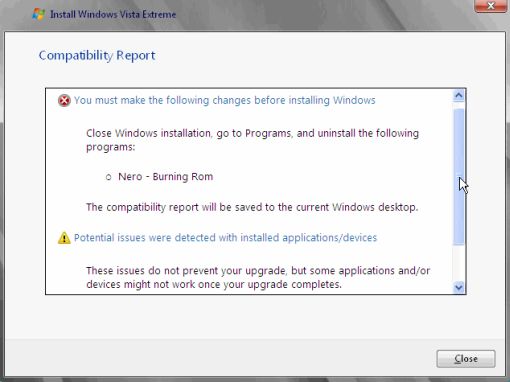
6. However, what you see here will depend on how many stuff you've installed on your computer, the more that you installed bigger the chance that there will be problems. The following screen is an example that Windows request you to uninstall the Nero - Burning Rom program before perform an upgrade.

7. Setup will continue exactly as it does during a clean install. Some of the steps will be skip such as configure your user name, password, display picture, and machine name, because you've presumably set up all of those options in your previous Windows version.
8. Setup jumps right to the Automatic Updates phase and then the time and date settings. After that, you click the Finish button, and Windows Setup tests your system performance and then loads the Welcome Screen.
If everything went well, you should be able to log on to your previously established user account and access a desktop. So, this is the step-by-step guide that allows you to upgrade to windows vista from your existing windows.
Can't find what you're looking for? Try Google Search!

|
|
Other Computer Training Links:
- What Are the Major Hardware Components of A Computer?
- Discover the Secrets Behind the Windows Vista Program
- Free Step-by-step Microsoft Office 2003 and 2007 Courses
- The Complete Guide to Setting up Network at Home or Office
- Internet Courses - Getting All The Possible Resources That You Can
- Your Ultimate Computer Data Backup and Recovery Training Course
- All You Needs to Know About Computer Viruses, Spywares, Malwares, Trojans, Worms, etc...
Back to Top
You're viewing the Upgrade to Windows Vista info page, click here to go back to the Home Page
Google Search:

Free Newsletter
Get your free subscription below to download two ebooks and improves your computer skills or click here for details.
Then why not use the button below, to add us to your favorite bookmarking service?
| FREE E-books | Office 2007 | Office 2003 | Internet & E-mailing | Sitemap |
Microsoft Windows 7, Vista, XP, Microsoft Office Word, Excel, PowerPoint,
and Outlook are either registered trademarks or trademarks of
Microsoft Corporation in the United States and/or other countries.